

How to Apply Clip-in Extensions: Beginner's Guide 2026
Clip-in extensions are the fastest way to instantly add volume and length to your hair without a salon or permanent treatment. With the right method, you can apply them in under ten minutes, and no one will notice the difference. This beginner’s guide to applying clip-in extensions takes you step by step: from preparation and placement to common mistakes and maintenance. Whether you choose premium clip-in extensions made of 100% human hair or try your first set, after reading this article you’ll know exactly what to do.
What tools do you need to apply clip-in extensions?
Good preparation determines 80% of the final result. Starting without the right materials wastes time and leads to a less natural look.
Here’s what you need before you start:
- A brush and a tail comb. Use the brush to smooth your hair. Use the tail comb to create neat horizontal parts.
- Clip-in extensions made of 100% human hair. Synthetic hair doesn’t blend well with your own hair and is harder to style. Brands like Capilli-extensions, Humano Hair, and Haartick Extensions use real hair for a natural result.
- Teasing powder or texturizing spray. Light teasing before clipping gives the clips more grip and keeps the extensions in place longer.
- Hairpins or duckbill clips. Use these to secure loose hair layers while you work.
- Dry shampoo (optional). Dry shampoo at the roots adds extra texture and grip, especially useful if your hair is naturally smooth or fine.
| Materials | Why it’s necessary |
|---|---|
| Tail comb | Creating neat, straight parts |
| Teasing powder | Better grip for the clips |
| 100% human hair extensions | Natural blend and styling ease |
| Hairpins | Securing loose layers during application |
| Dry shampoo | Extra texture for smooth or fine hair types |
Pro tip: Always work with dry, tangle-free hair. Damp hair provides less grip and increases the chance that the clips will slip.
How to apply clip-in extensions step by step?
This is the core of every clip-in extensions tutorial: the order of placement determines whether the result looks professional or visibly amateurish. Follow these steps and you’ll have a natural look in less than fifteen minutes.
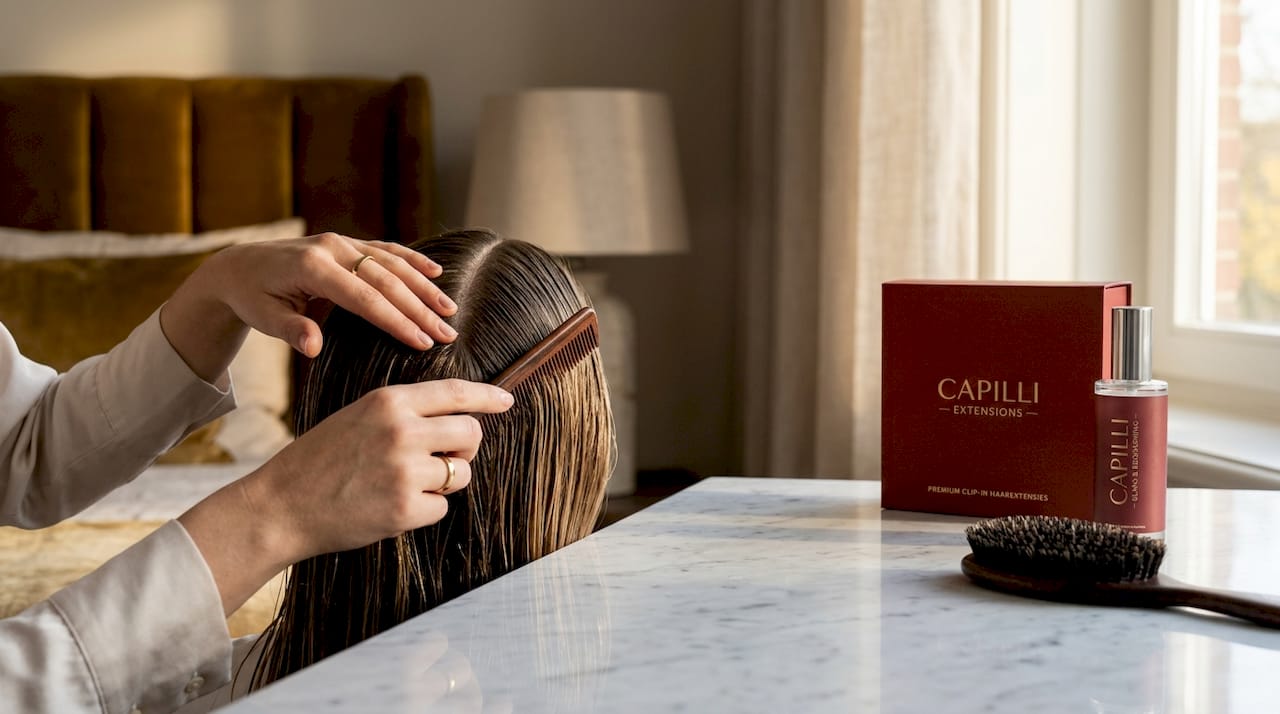
Step 1: Start at the nape
Start at the nape, about 3 cm above the hairline, and work upwards in layers. This is the most common beginner mistake in reverse order: those who start at the top have no coverage at the bottom. Secure all hair above the first parting with a hairpin.
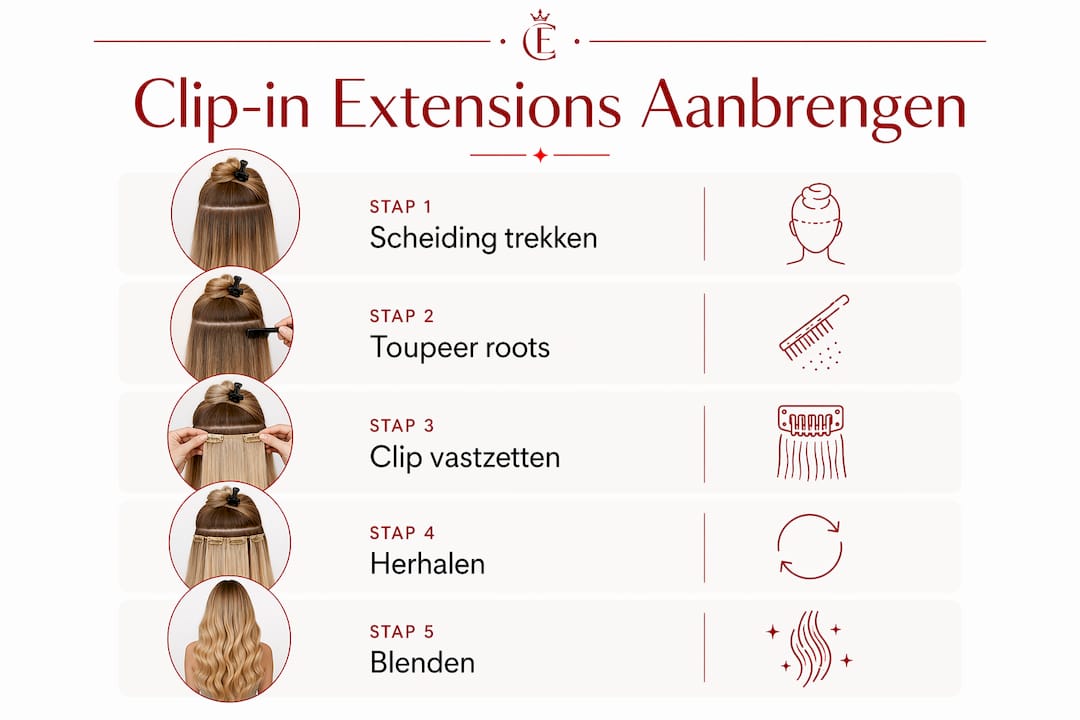
Step 2: Create a neat horizontal parting
Use a rat-tail comb to create a straight, horizontal parting. Start with dry, well-brushed hair and make the parting just above the ears or at the widest point of the head. A crooked parting makes the extensions visible, so take your time here.
Step 3: Lightly tease along the parting line
Tease the hair roots where the clip will be placed. This gives the clip something to grip onto and prevents the weft from sliding down during the day. Use a small amount of teasing powder or texture spray for this.
Step 4: Click the largest weft in place
Start with the largest strip at the bottom and work upwards with smaller strips. Open the clips by pressing them open, place them on the parting, and click them shut. Check that the weft lies flat and shows no visible gaps. Always place the clips parallel to the head for a natural distribution.
Step 5: Release the next layer and repeat
Release a new layer of hair, create another horizontal parting, and repeat the process. Work from bottom to top. Use a slightly smaller weft with each new layer so the coverage narrows at the top and the overall look is natural.
Step 6: Blend your own hair with the extensions
Comb your own hair over the extensions with a wide brush. For a natural blend, it’s important to brush multiple times and possibly use a curling technique to conceal the transition. A few soft waves with a curling or straightening iron make the difference between “visible” and “invisible.”
| Step | Action | Goal |
|---|---|---|
| 1 | Start 3 cm above the hairline | Clips remain hidden |
| 2 | Create a horizontal parting | Neat, straight placement |
| 3 | Light teasing | Better grip for the clip |
| 4 | Largest weft at the bottom | Maximum volume at the nape |
| 5 | Work layer by layer upwards | Even coverage |
| 6 | Blend with brush or curling iron | Seamless transition |
Pro tip: Clip-in extensions can be applied in just a few minutes and are easy to click out. Practice the first time at home without time pressure, so you get to know the technique before using it for a real occasion.
What mistakes do beginners make with clip-in extensions?
Most beginners make the same three mistakes. They are easy to avoid if you know what to watch out for.
- Placing too close to the hairline. The positioning of clips is crucial for invisibility: clips placed too low are visible, clips placed too high are uncomfortable and slip off. Always keep at least 3 cm away from the hairline.
- Not using teasing. Without light teasing, the clips have nothing to grip onto, especially with fine or smooth hair. Even a small amount of texturizing spray makes a noticeable difference.
- Choosing the wrong color. Wefts that don’t match your own hair color stand out immediately, even if the placement is perfect. Match the color to your mid-lengths or ends, not your roots. Laying wefts flat and matching the color well are the two most underestimated steps.
- Spraying products on the clips. Hairspray or oil directly on the clips makes them sticky or damages the mechanism. Use products only on the hair itself, not on the clip zone.
- Forgetting to blend. Extensions without blending always look artificial. Always take the time after placing them to comb your own hair over the wefts.
“There is no one-size-fits-all method. The right technique depends on your hair type and lifestyle.” Adjust the placement based on how thick or fine your hair is, and experiment with the number of wefts until you reach the desired volume.
How do you maintain clip-in extensions for longer durability?
Clip-in extensions made of 100% human hair last months to years with proper care. The key is a simple routine that doesn’t take much time.
- Don’t wash them too often. Wash clip-in extensions only after 15 to 20 days of wear, and only if they are really dirty. Clip-ins are not permanent and therefore need to be washed much less often than your own hair.
- Use mild shampoo and conditioner. Avoid products with sulfates or alcohol. Wash the wefts gently in lukewarm water and be careful not to stress the clip zones by rubbing them hard.
- Detangle daily. A mini three-minute brushing moment prevents tangles and damage. Use a soft brush and always start at the bottom, then work your way up to the roots.
- Use low temperatures when styling. Heat damages human hair, even in extensions. Use a heat protection spray and set your straightener or curling iron to a maximum of 180 degrees Celsius.
- Store them properly. Keep your extensions in a satin pouch or on an extension hanger. This prevents tangling and keeps the wefts in shape.
Pro tip: Wash your hair a day before use and use dry shampoo or texture spray at the roots on the day itself. Always work with dry, tangle-free hair and use hairpins as a tool when applying. This gives the best grip and the most natural result.
For more detailed care tips, check out the comprehensive care guide from Capilli-extensions.
What I really want to share after years of working with extensions
I’ve seen hundreds of clients struggle with clip-in extensions, and almost always the problem isn’t with the extensions themselves. It’s the expectation that it has to be perfect the first time.
The truth is: the first time it might take twenty minutes and it won’t look exactly how you want. The fifth time you do it in eight minutes and everyone asks if your hair is real. That difference is purely practice, not talent or an expensive product.
What I also see: people buy extensions that don’t match their hair type. Someone with very fine hair buys a heavy 200-gram set and then wonders why the clips are visible. For fine hair, a lighter set of 100 to 130 grams works much better. The invisible clip-in extensions are specially designed for people with finer hair because the wefts are thinner and lighter.
Another point I want to emphasize: color is more important than technique. Perfect placement with the wrong color always looks off. Perfect color with slightly less perfect placement almost always looks good. So spend more time choosing the right color than practicing the technique.
Finally: trust the process. Clip-in extensions are the most forgiving extension method there is. You can clip them out, try again, and adjust until it looks right. That’s a huge advantage over permanent methods. Use that advantage.
— Valentina
Discover premium clip-in extensions at Capilli-extensions
Capilli-extensions offers a wide range of premium clip-in extensions made of 100% human hair, ethically sourced and available in dozens of colors and weights. Whether you are looking for extra volume, more length, or an invisible blend, there is a suitable option for every hair type.
With an average customer rating of 4.8 out of 5 and extensive product information per extension type, Capilli-extensions has everything you need to get started right away. View the full range at capilli-extensions.com and find the extensions that suit your hair and style.
FAQ
How long does it take to apply clip-in extensions?
With some practice, you can apply clip-in extensions in five to ten minutes. The first time takes a little longer because you are still learning the technique.
How many cm above the hairline do you place the clips?
Place clips at least 3 cm above the hairline. Too close to the hairline makes the clips visible; placing them too high increases the chance of slipping.
How often should you wash clip-in extensions?
Wash clip-in extensions only after 15 to 20 days of wearing, and only if they are really dirty. Washing less frequently extends their lifespan and prevents tangling.
Do clip-in extensions also work on fine hair?
Yes, but then choose a lighter set of 100 to 130 grams and lightly tease the roots for extra grip. Heavy sets are more likely to show clips on fine hair.
Can I style clip-in extensions with heat?
Clip-in extensions made of 100% human hair can be styled with heat. Always use a heat protection spray and set your device to a maximum of 180 degrees Celsius to prevent damage.
Key insights
Applying clip-in extensions for beginners works best with dry hair, light teasing, and a fixed order from bottom to top.
| Tip | Details |
|---|---|
| Always start at the bottom | Start 3 cm above the hairline and work layer by layer upwards for optimal coverage. |
| Tease for grip | Light teasing on the clip zone gives the weft more grip and prevents slipping. |
| Choose the right color | Match the extension color to your mid-lengths for the most natural blend. |
| Wash as little as possible | Wash clip-in extensions only after 15 to 20 days and use mild, sulfate-free products. |
| Practice without time pressure | Practicing at home for the first time gives you confidence for real occasions. |